Friday, January 11, 2013

DIY Project: Reupholster Chairs

My husband have had this table and chair set for eons. While they might not be my particular style, they are high quality and in fairly good condition. The fabric on the chairs seats , however, have started showing major signs of wear. As we currently rent, we haven't been in any hurry to replace them. Instead I've been thinking about redoing them myself for quite a while, and finally took the plunge. I've never done any furniture reupholstery before, but it was easy enough. I improvised the process, taking notes as I took the chairs apart, and then put them together again in the reverse order. Piece of cake!

Chairs, Before

I got a bunch of amazing Caitlin Wilson pillows when I redid my office last year, and ever since, I've wanted to use this gorgeous Mint Fleur Chinoise print to reupholster these chairs. Finally, finally, I pulled the trigger and ordered the fabric, in spite of its $60/yard price tag.

Source: Caitlin Wilson Textiles

I've been waiting for the fabric to arrive for what feels like eons, which makes me feel like I've been working on this project for weeks, when I in fact have not. Luckily, when the fabric actually got here, the project took about an hour and a half from start to finish, which isn't bad given the fact that I had absolutely no idea what I was doing. Here are my "new" chairs:


Chairs, after

I'm so glad to finally have this project completed, and I love, love, LOVE how they turned out! They've brightened up my little kitchen nook so much! I find myself repeatedly walking through the kitchen, for no reason other than to admire my pretty, new chairs.

Before/After

Fabric:

2 yards Caitlin Wilson Textiles Mint Fleur Chinoise, $120

Thursday, January 3, 2013

DIY Project: Pom Pom Garland

I've seen pom pom garlands all over the place lately, and as I love pom poms, I've been dying to make my own for ages, to decorate the rack of the faux taxidermy deer head in my office. The other day, the massive bag of Pom Poms I ordered online finally arrived on my door step, and I made this garland this morning.


DIY Project: Pom Pom Garland

This project is super easy, very fast from start to finish, and so so cute!

What you'll need: 
pom poms
string, yarn, or fishing line
embroidery needle

You can use any type of pom poms for this project; felt, yard, or "fuzzies" like these.

What to do:
1. Starting 12 inches from one end of the string (or however long you think you'll need to attach the garland when using it), start adding a pom pom by spearing through it with your needle and thread. You can knot the thread around each pom pom, but if they sit fairly snug on the string, like min did, there's no need.
2. Repeat step 1, for however long you want your garland, adding another, and another, leaving a suitable space between each pom pom. Leave extra string on the other side as well.
3. Done!

I used an embroidery needle to make my garland, which worked well, but regular sewing needles would also have worked.

Perfect for holiday or party decor, or to spruce up a faux taxidermy rack. I also have tons of left over pom poms, and several other pom pom projects coming up!

 via my Instagram

I love my little pom pom garland! It fits in perfectly in my office!

Tuesday, January 1, 2013

DIY Project: Ribbon Hair Ties (Retail Knockoff)

Have you seen these awesome ribbon style hair ties? I love them, as they do not leave a "pony tail dent" in my extremely straight hair, even if I wear them all day. They usually retail for a ridiculous $1-$3 a pop (!!!), and I've been meaning to make my own for quite some time. I finally pulled the trigger, and when I calculated the cost of making these, and compared it to the retail versions, I'm glad I didn't wait another day.

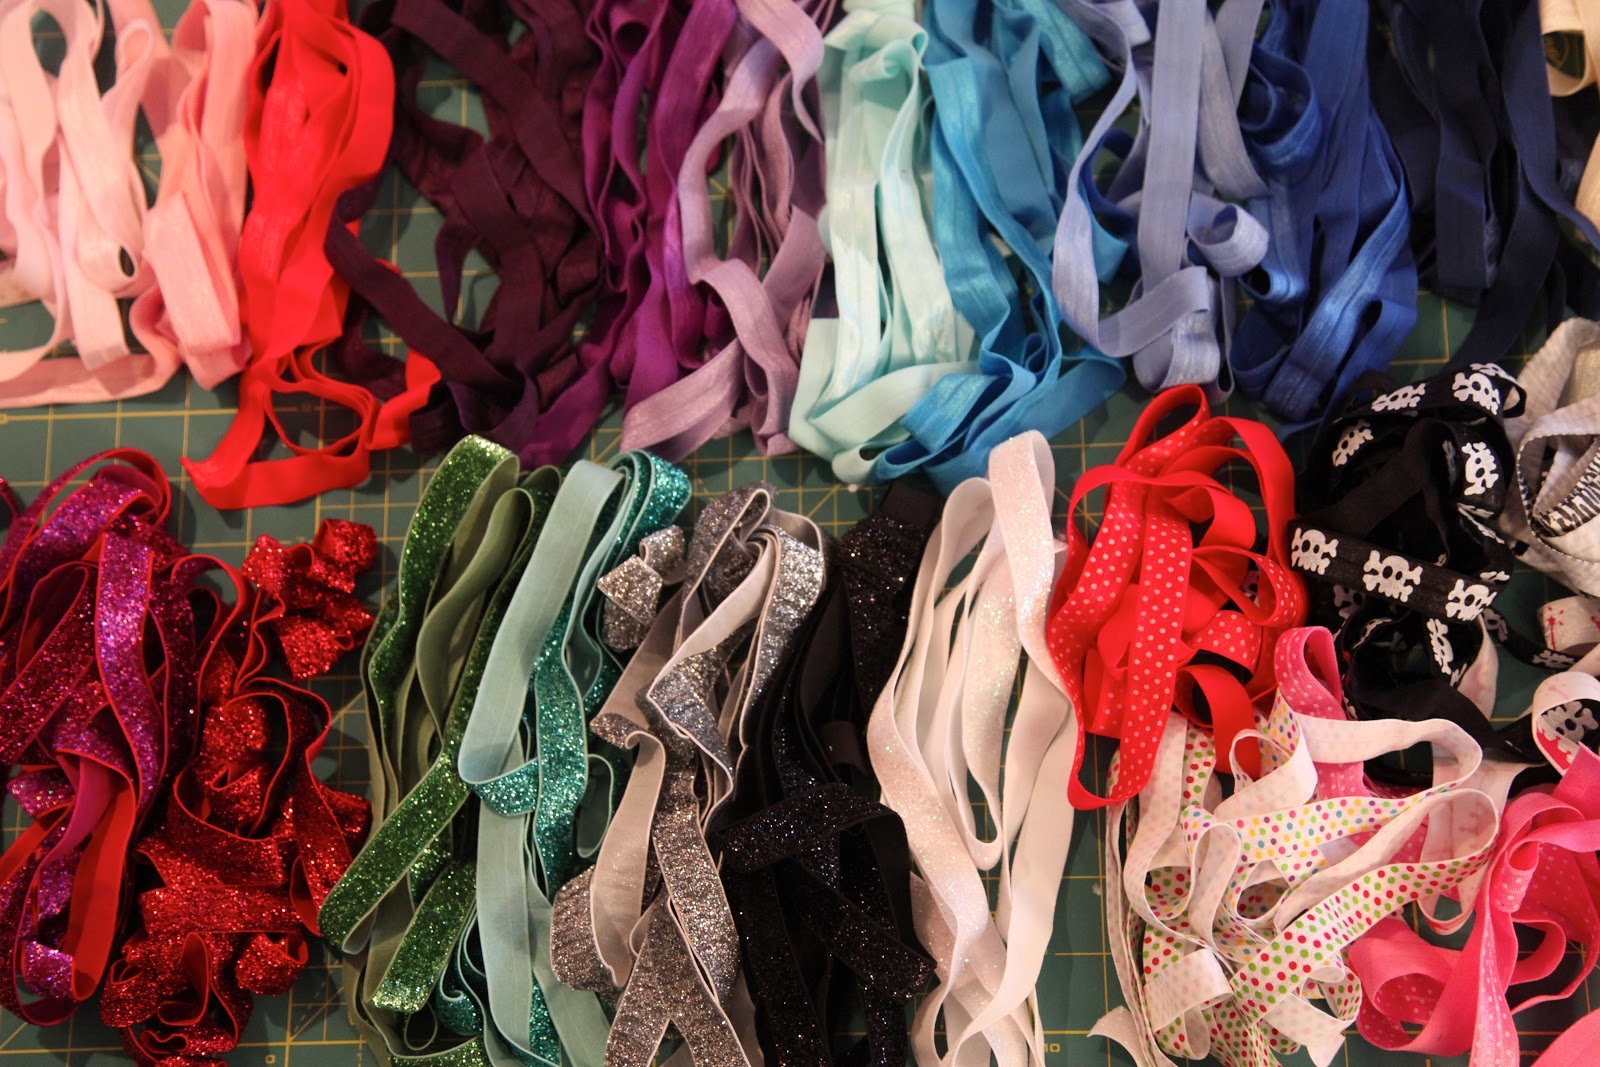
I ordered plain elastic online here, and printed and glitter versions here, for next to nothing compared to the  retail prices! I was honestly appalled when I found this stuff for $1.35 for FIVE yards, and you can make 3-4 hair ties per yard. It seems a lot of people must be rolling in their crazy hair-tie profits!


DIY Project: Ribbon Hair Ties

Make plain sets, tie them off in a knot or bow, ends going in the same direction, or not. It all looks different on the pony tail (& on the wrist), so experiment to find which style you like best. Pretty coordinated sets makes for a cute little gift, or party favor.

What you'll need:
Fold Over Elastic, (FOE)

ruler or measuring tape
very sharp scissors

Ok, so maybe I went a little bit overboard when ordering supplies... I was exited.

What to do:

1. Measure between 8"-10" piece of FOE, depending on hair thickness and personal preference. I use a 10" for my hair ties, and it makes for the perfect tie for my hair (& my wrist).
2. Cut elastic, fold with pretty side out, and tie a knot or bow. Experiment with the type of knot, to find the look you like best. Clean up FOE edges (if needed).
3. Voila! Your hair tie is finished!

I made my hair ties in bulk, moving the entire batch through each step before moving on to the next. 
For example, I cut all my 10" FOB first, tied all of them, and then trimmed all the edges after that. Still, it was quite fast!

Retail:
Emi-Jay (the original): different collections of 5, ranging from $10.99 - $12.99
DIY:
DIY Ribbon Hair Ties, $1.35 for 20
DIY Printed Ribbon Hair Ties, $0.90 for 4
DIY Glitter Ribbon Hair Ties, $1.20 for 4 


Can you tell which hair ties are my DIY version and which ones are Emi-Jay brand?

DIY vs Retail. Can you tell the difference?

Crazy, right? I mean, that's really CRAZY!!! So, do yourself a favor and DIY some of these. It takes about a minute, and both your hair & your wallet will thank you.

Coordinated hair tie sets, ready for gifting

After having completed 42 DIY projects in 2012 (not counting redoes, multi-post reveals, food, etc.), and I'm looking forward to increasing that number in 2013. My goal is to complete 52 projects, averaged over the next 52 weeks. Given travel etc., that sounds challenging, yet achievable. This quiet, low key project was the perfect activity for a lazy day recovering from bringing in the New Year.

Monday, December 31, 2012

DIY Project: Elephants & Dots Baby Quilt

In early 2012, I decided to finally tackle something that had been on my Bucket List for years, and throughout this past year, using pure improvisation and stubbornness, I've slowly taught myself to make quilts. It seems fitting that I finished one of my favorite quilts I've made so far, on the last day of this year.


I started with this absolutely adorable, organic fabric line from Birch Fabrics, in a coordinating mix of gray, white, teal and soft aqua.


I really love the mix of colors and prints in this line! It's so gorgeous! 


After waffling back and forth for a couple of days over the quilt top design, I eventually decided to go with a simple wide stripe design, very similar to my last quilt, in a reverse ascending/descending pattern. I started this cute little quilt last night, cut, pieced, and quilted it, and then made and finished the binding this morning. 


I used the gray solid from the quilt top for the backing, adding a simple initial in the bottom, right corner for a little pop of color and personalization (this quilt is another gift). 


This time, instead of regular appliqué for the personalization, I opted to sew the H from two layers of solid teal, right sides in, then turning it right side out, pressing, and attaching it with a simple top stitch around the edge, before I added the quilting. I do hope it will be durable enough this way, as I really like this look. 


For the binding, I first folded the overhanging backing fabric over the edge, then added a homemade double binding on top of that. I made the binding using left over aqua solid from the quilt top.


I love the thin edge of gray peeking out from under the aqua binding! In fact, I absolutely LOVE this little quilt! It's been so fun figuring out how to do this this past year, and I love seeing improvements in my technique with each completed project.


I really hope cute little H gets a lot of use out of this cuddly little quilt!

*All photos are taken pre-wash, and the quilt is a lot more crinkly and puffy post-wash, but I forgot to retake them after it came out of the dryer, and now I've already packed it to ship.

Fabric:

Quilt top:
Jay-Cyn Designs for Birch Fabric Organic, Mod Basics, Ellie Fam in Shroom, Teal and Pool
Jay-Cyn Designs for Birch Fabric Organic, Mod Solids in Teal, Pool, Shroom, and White

Quilt back:
Yay-Cyn Designs for Birch Fabric Organic, Mod Solids in Shroom and Teal

Binding:
Jay-Cyn Designs for Birch Fabric Organic, Mod Solids in Pool

Saturday, December 29, 2012

DIY Project: Floral Sunglasses

I almost died when I first saw this tutorial from Honestly... WTF, it was Love At First Sight. I knew I had to make a pair. Or twenty.

Here is what I came up with:


I used a cheap pair of Sunreaders (I never even knew these existed before my eyes got old and crappy), e6000 glue, and some resin flowers ordered from Etsy to make my shades. They took about 10-15 minutes to make, and only that because I had to wait for the glue to get tacky enough to hold the flowers to the frames while it dried completely. 


My favorite type of DIY: quick, easy and oh, so fabulous!


Now all I want to do is drive down HWY 1 with the top down, blasting Lana Del Ray (and singling along at the top of my lungs), while shielding my eyes from the sun with these fabulous shades!

Saturday, December 22, 2012

DIY Project: Studded iPhone Case

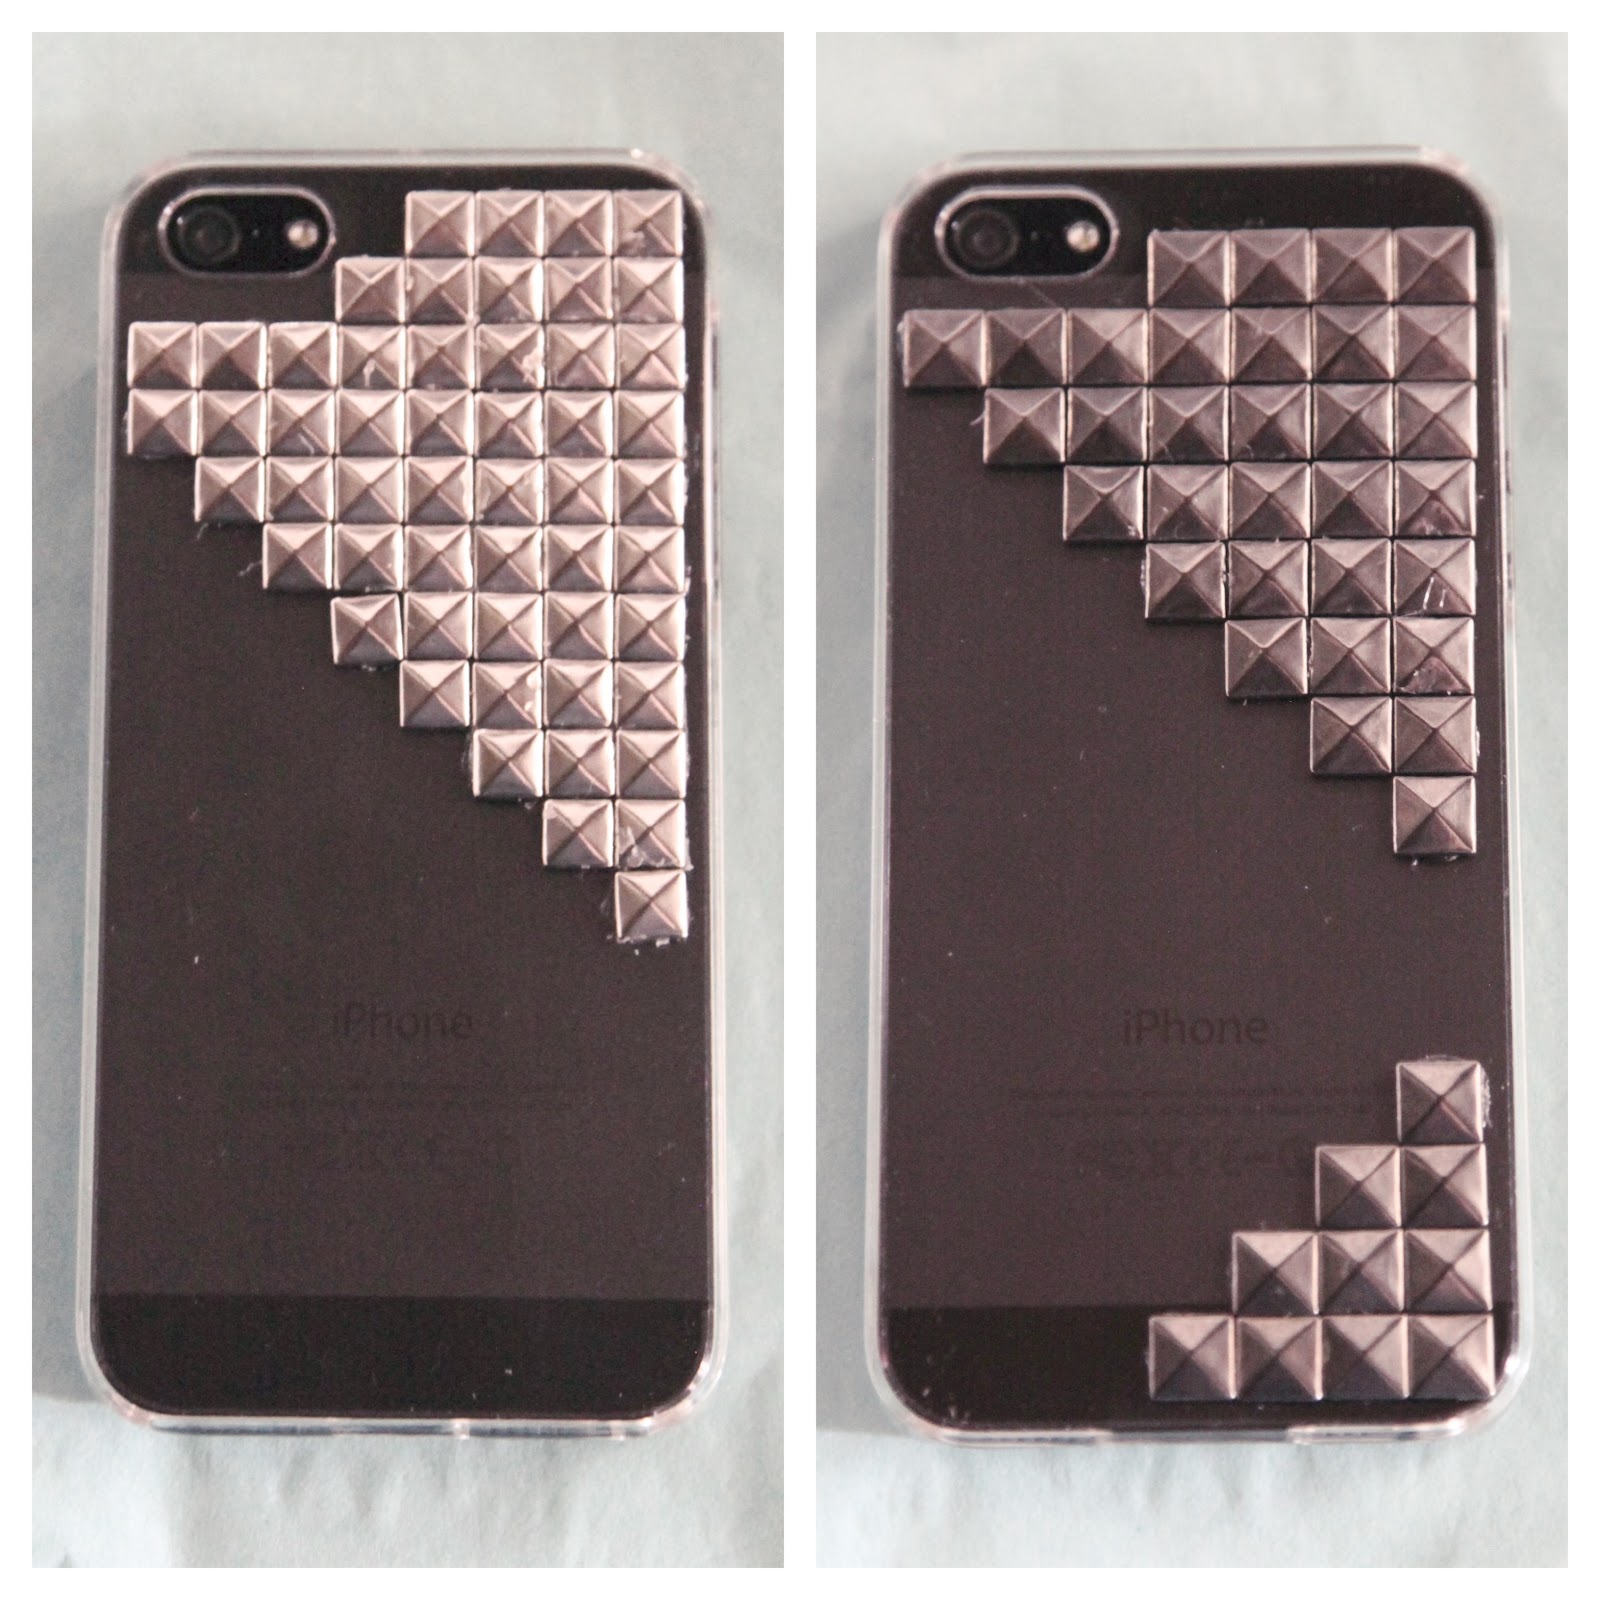
I've been using a simple, clear case ever since I upgraded my iPhone 4 for a 5. I've seen a bunch of these studded cases lately, and really liked them, but none of the ones I saw were made to fit the iPhone 5. I also didn't want a colored case with studs, I wanted a clear case with studs. Since I couldn't find one, I figured I'd just make my own.

This is what I came up with:


DIY Project: Studded iPhone Case

What you'll need:
hard iPhone case
flat studs
strong glue

long bamboo skewers or tooth picks (or what have you) to apply glue & move studs around


What to do:
1. Determine your pattern first. Use a ruler and a pencil, or tape if your case material won't tolerate pencil, as a guide if you feel like you need it. I free-handed mine, and they turned out fine.
2. Add a small amount of glue to a paper plate, it dries quickly, so refresh as needed. Start gluing your studs, being careful to place them straight and evenly.
3. Wait [impatiently] while the glue dries.

Voila! Awesome iPhone case!


Cost:
Clear iPhone 5 hard case, $2.99
100 flat stud, $9

Each case came out to approximately $7 each.


Now I just need to decide on which I will use first, gun metal, or silver? 


Friday, December 21, 2012

DIY Project in Action: Cheesy Christmas Ornament Earrings

I made these quick & easy Cheesy Christmas Ornament Earrings before my recent trip to Sweden, to give to all my girl friends for our Christmas Get-Together/Cookie Party.


They were perfect as a fun little party favor.


My beautiful friends modeled them perfectly!


A lot of my Swedish friends now have kids (a few of them even have several!), and they got plastic glitter version, not the ones made with glass ornaments, as they are extremely fragile, and not exactly "baby safe".


I wish I would have made a few clip-on version as well, as little Bonnie, who doesn't have pierced ears, wanted a pair as well. This was an acceptable workaround though.


It was lovely seeing these ladies, and super fun to meet all their littles. Hope y'all like your festive little earrings!