The inspiration for this absolutely enormous, ocean-themed quilt was this gorgeous fabric line, 'Saltwater' from Tula Pink.

These prints makes me think of summer days by the ocean of my childhood, sun bathing, swimming, and hanging out with friends to the sound of lapping waves. I thought it would be perfect for a beach quilt, a massive upgrade from the sun bleached batch towels my friends & I used to lie on while working on our summer tans, during countless sunny days spent by the sea.
 10 feet by 10 feet (that's 3x3 meters to my metric using friends) picnic/beach quilt
For the quilt top, I used a large simple block arranged in a descending repeat to showcase the different prints. Although I had a bit of shift sneak in here and there in the quilt top, I still really love how it turned out.

All the prints in the line are some combination of gorgeous coral, but still dynamic enough not to be boring. I love the colors, and the maritime theme as well!

For the backing, I went with a wide pieced vertical stripe, alternating each of the four main coral prints that I used for the quilt top. Since this quilt is so large, 10 feet by 10 feet, I knew I wouldn't be able to use continuous yardage to cover it anyways. I was debating using a waterproof backing fabric, which I think is brilliant for a picnic blanket, both to keep moisture and stains at bay. However, I remember making my waterproof bikini bags, how the oil cloth lining made them really heavy to work though my machine, and those bags were tiny. Magnify that by the massive size of this quilt, and I was worried it would get too bulky for my little sewing machine to handle. It is really hard to work a large size quilt though my little machine, as it is not a long arm machine. With the heavy batting I'm using, I'm really pushing the limits of my equipment, so I had to decide against it. Bummer.
 Quilt backing
 Quilt backing, closeup
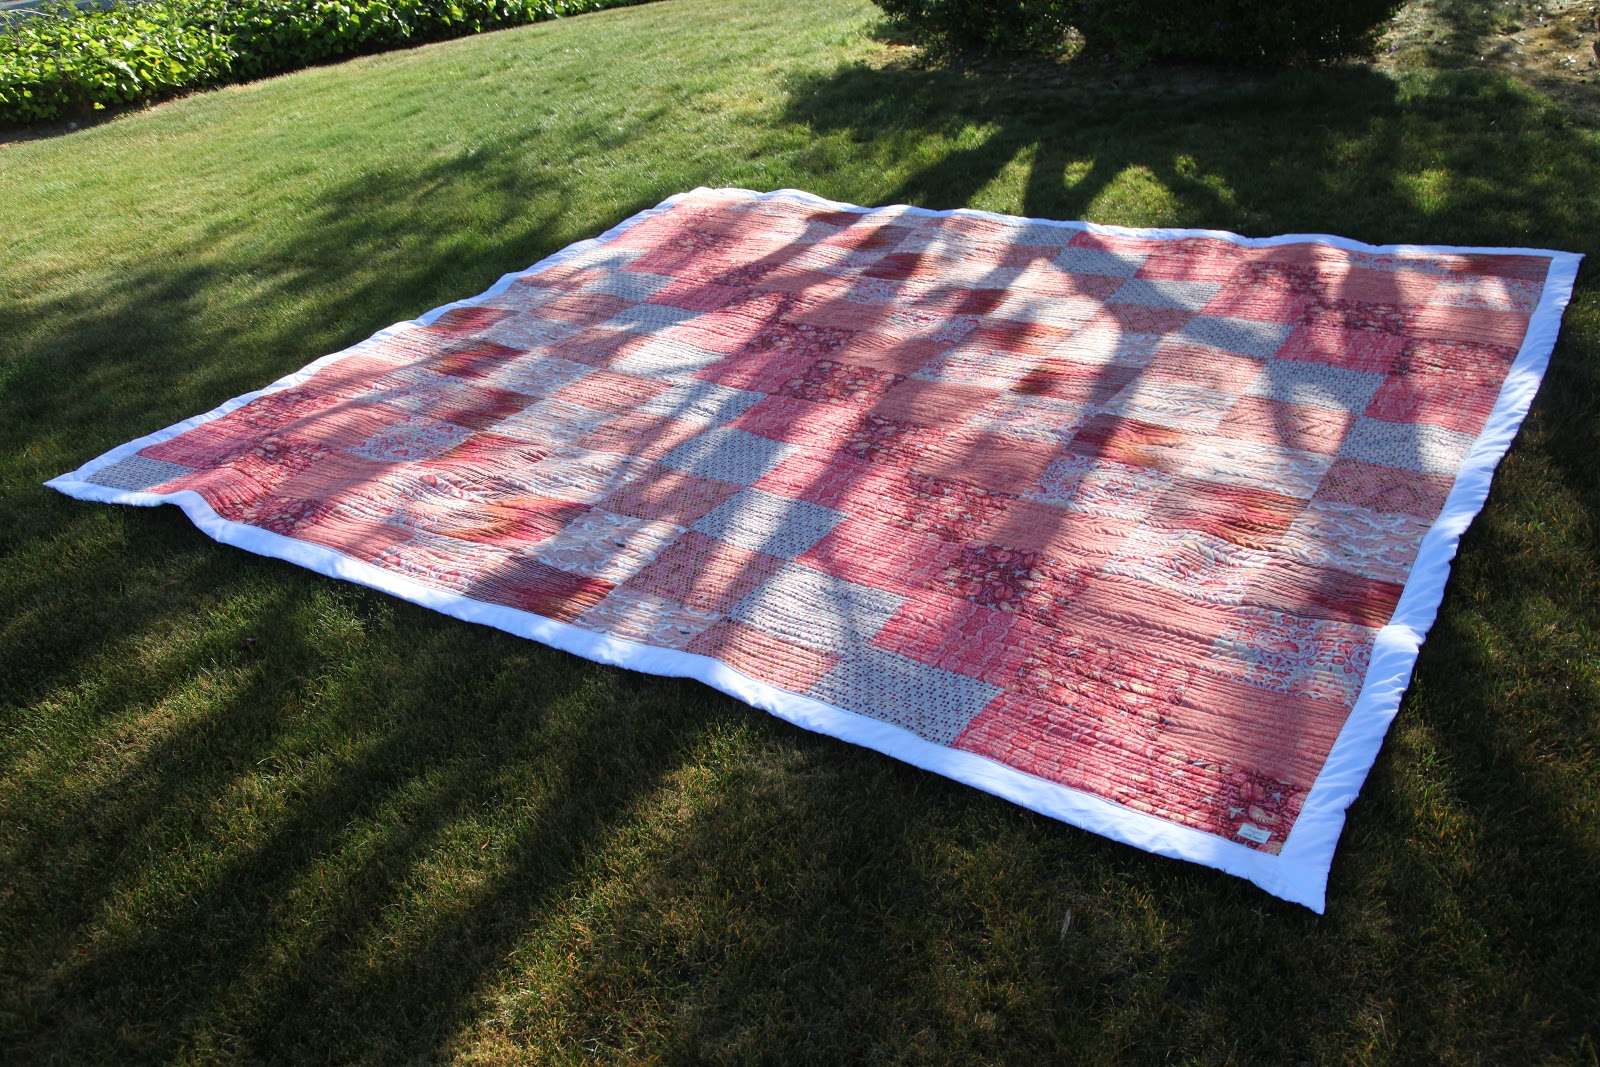
For the quilting pattern, I did this narrow horizontal line pattern, purposefully keeping my lines a bit wavy and uneven. I was thinking of the ripple pattern of sand stroked by lapping waves or wind. I like how it turned out, and the tight quilting gives that puckered, vintage quilt look, which I just adore.

The binding is homemade from solid, white cotton, and I used a new technique to attach it. Usually, I first fold over a "fake binding" made from the overhanging backing fabric, and then I attach a double folded binding on top of it. Initially I did this just for the added durability on baby quilts, as I know they get washed a lot. I actually really like the look of the two bindings, the bottom one peeking out under the top, so I stuck with it. This technique makes it easier to apply the top binding as well, compared to cutting off the backing fabric and attaching the binding directly on the raw edge. I don't even use pins when I do the binding this way!

However, as I mentioned, this time I used a new method that I saw on Pinterest. For this method I used a single folded homemade binding, and attached it on the backside first, and then folded it over the raw edge and topstitch it to the front (although I think most people hand stitch it to the front). Honestly, I hate this method. It looks ok, but it was A LOT harder than my own technique. The corners, in particular, were a real bitch, and it made me realize why a lot of quilters hand stitch their binding even on machine quilted projects. This method seemed better made for hand stitching. I will not be doing it this way again. No, thankyouverymuch. I'll stick to my own method in the future, but I'm glad I tried it.
As this quilt is meant for picnics and trips to the beach, I used a very heavy cotton batting, not the light, airy bamboo batting I normally use. Hopefully it's thick enough to be comfortable on uneven ground, and help prevent moisture from lawns, beaches and docks from seeping through the quilt. Since this quilt is so huge, it is also HEAVY, I made one of my custom Quilt Carry Strap for it. The quilt strap is of my own design, and makes this quilt easily portable, in spite of its size and weight, without permanently attaching any straps, handles, or hardware to the actual quilt. Of course, I also matched the padded handle to the quilt, using leftover scraps from the top.

Making this quilt has been a long process that begun back in January. Twice I had to put it on hold while piecing the top, until more supplies arrived. Although I went in to this knowing it was the biggest quilt I'd ever attempted, I underestimated the huge amount of materials necessary, not to mention the work. The quilting, even with this very simple horizontal line, alone took several weeks! The quilt was so heavy to wrangle through my machine, I couldn't do it in one stretch, as I usually do. The entire quilt, from start to finish, took 3 months to complete, although, I did not work on it every day. Condensed into a continuos stretch of 12-hour days, it would be closer to 3 weeks.

Fabric:
Quilt top:
1 1/2 yards Tula Pink, Saltwater, Bubble Shells, Coral
1 1/2 yards Tula Pink, Saltwater, Submarines and Seaweed, Coral
1 1/2 yards Tula Pink, Saltwater, Tortoise Shell, Coral
1 1/2 yards Tula Pink, Saltwater, Octo Garden, Coral
1 1/2 yards Tula Pink, Saltwater, Floaters and Sinkers, Coral
1 1/2 yards Tula Pink, Saltwater, Sea Debris, Coral
1 1/2 yards Tula Pink, Saltwater, Ocean Ponies, Coral
1 1/2 yards Tula Pink, Saltwater, Sea Stripes, Coral
Backing:
3 yards Tula Pink, Saltwater, Coral
3 yards Tula Pink, Bubble Shells, Coral
3 yards Tula Pink, Octo Garden, Coral
3 yard Floaters and Sinkers, Coral
Binding:
solid cotton, white

These prints makes me think of summer days by the ocean of my childhood, sun bathing, swimming, and hanging out with friends to the sound of lapping waves. I thought it would be perfect for a beach quilt, a massive upgrade from the sun bleached batch towels my friends & I used to lie on while working on our summer tans, during countless sunny days spent by the sea.
For the quilt top, I used a large simple block arranged in a descending repeat to showcase the different prints. Although I had a bit of shift sneak in here and there in the quilt top, I still really love how it turned out.

Quilt top
All the prints in the line are some combination of gorgeous coral, but still dynamic enough not to be boring. I love the colors, and the maritime theme as well!

Quilt top pattern, closeup
For the backing, I went with a wide pieced vertical stripe, alternating each of the four main coral prints that I used for the quilt top. Since this quilt is so large, 10 feet by 10 feet, I knew I wouldn't be able to use continuous yardage to cover it anyways. I was debating using a waterproof backing fabric, which I think is brilliant for a picnic blanket, both to keep moisture and stains at bay. However, I remember making my waterproof bikini bags, how the oil cloth lining made them really heavy to work though my machine, and those bags were tiny. Magnify that by the massive size of this quilt, and I was worried it would get too bulky for my little sewing machine to handle. It is really hard to work a large size quilt though my little machine, as it is not a long arm machine. With the heavy batting I'm using, I'm really pushing the limits of my equipment, so I had to decide against it. Bummer.


For the quilting pattern, I did this narrow horizontal line pattern, purposefully keeping my lines a bit wavy and uneven. I was thinking of the ripple pattern of sand stroked by lapping waves or wind. I like how it turned out, and the tight quilting gives that puckered, vintage quilt look, which I just adore.

Quilting pattern, pre-wash

Quilt label and binding, via my Instagram
As this quilt is meant for picnics and trips to the beach, I used a very heavy cotton batting, not the light, airy bamboo batting I normally use. Hopefully it's thick enough to be comfortable on uneven ground, and help prevent moisture from lawns, beaches and docks from seeping through the quilt. Since this quilt is so huge, it is also HEAVY, I made one of my custom Quilt Carry Strap for it. The quilt strap is of my own design, and makes this quilt easily portable, in spite of its size and weight, without permanently attaching any straps, handles, or hardware to the actual quilt. Of course, I also matched the padded handle to the quilt, using leftover scraps from the top.


1 1/2 yards Tula Pink, Saltwater, Bubble Shells, Coral
1 1/2 yards Tula Pink, Saltwater, Submarines and Seaweed, Coral
1 1/2 yards Tula Pink, Saltwater, Tortoise Shell, Coral
1 1/2 yards Tula Pink, Saltwater, Octo Garden, Coral
1 1/2 yards Tula Pink, Saltwater, Floaters and Sinkers, Coral
1 1/2 yards Tula Pink, Saltwater, Sea Debris, Coral
1 1/2 yards Tula Pink, Saltwater, Ocean Ponies, Coral
1 1/2 yards Tula Pink, Saltwater, Sea Stripes, Coral
Backing:
3 yards Tula Pink, Saltwater, Coral
3 yards Tula Pink, Bubble Shells, Coral
3 yards Tula Pink, Octo Garden, Coral
3 yard Floaters and Sinkers, Coral
Binding:
solid cotton, white


That is so beautiful, Annelie!!
ReplyDeleteThank you, Beth!
DeleteI love it! The quilt I made used this binding technique and it was a big pain. I will have to try again with your technique now that I know it is easier and cleaner. Thanks for sharing.
ReplyDeleteI found this technique really difficult, definitely like my usual method a lot better. Let me know how you like it if you do end up trying it. I hope you like it.
Delete