Showing posts with label ProjectYearbook2012. Show all posts

Monday, December 31, 2012

DIY Project: Elephants & Dots Baby Quilt

In early 2012, I decided to finally tackle something that had been on my Bucket List for years, and throughout this past year, using pure improvisation and stubbornness, I've slowly taught myself to make quilts. It seems fitting that I finished one of my favorite quilts I've made so far, on the last day of this year.


I started with this absolutely adorable, organic fabric line from Birch Fabrics, in a coordinating mix of gray, white, teal and soft aqua.


I really love the mix of colors and prints in this line! It's so gorgeous! 


After waffling back and forth for a couple of days over the quilt top design, I eventually decided to go with a simple wide stripe design, very similar to my last quilt, in a reverse ascending/descending pattern. I started this cute little quilt last night, cut, pieced, and quilted it, and then made and finished the binding this morning. 


I used the gray solid from the quilt top for the backing, adding a simple initial in the bottom, right corner for a little pop of color and personalization (this quilt is another gift). 


This time, instead of regular appliqué for the personalization, I opted to sew the H from two layers of solid teal, right sides in, then turning it right side out, pressing, and attaching it with a simple top stitch around the edge, before I added the quilting. I do hope it will be durable enough this way, as I really like this look. 


For the binding, I first folded the overhanging backing fabric over the edge, then added a homemade double binding on top of that. I made the binding using left over aqua solid from the quilt top.


I love the thin edge of gray peeking out from under the aqua binding! In fact, I absolutely LOVE this little quilt! It's been so fun figuring out how to do this this past year, and I love seeing improvements in my technique with each completed project.


I really hope cute little H gets a lot of use out of this cuddly little quilt!

*All photos are taken pre-wash, and the quilt is a lot more crinkly and puffy post-wash, but I forgot to retake them after it came out of the dryer, and now I've already packed it to ship.

Fabric:

Quilt top:
Jay-Cyn Designs for Birch Fabric Organic, Mod Basics, Ellie Fam in Shroom, Teal and Pool
Jay-Cyn Designs for Birch Fabric Organic, Mod Solids in Teal, Pool, Shroom, and White

Quilt back:
Yay-Cyn Designs for Birch Fabric Organic, Mod Solids in Shroom and Teal

Binding:
Jay-Cyn Designs for Birch Fabric Organic, Mod Solids in Pool

Saturday, December 29, 2012

DIY Project: Floral Sunglasses

I almost died when I first saw this tutorial from Honestly... WTF, it was Love At First Sight. I knew I had to make a pair. Or twenty.

Here is what I came up with:


I used a cheap pair of Sunreaders (I never even knew these existed before my eyes got old and crappy), e6000 glue, and some resin flowers ordered from Etsy to make my shades. They took about 10-15 minutes to make, and only that because I had to wait for the glue to get tacky enough to hold the flowers to the frames while it dried completely. 


My favorite type of DIY: quick, easy and oh, so fabulous!


Now all I want to do is drive down HWY 1 with the top down, blasting Lana Del Ray (and singling along at the top of my lungs), while shielding my eyes from the sun with these fabulous shades!

Saturday, December 22, 2012

DIY Project: Studded iPhone Case

I've been using a simple, clear case ever since I upgraded my iPhone 4 for a 5. I've seen a bunch of these studded cases lately, and really liked them, but none of the ones I saw were made to fit the iPhone 5. I also didn't want a colored case with studs, I wanted a clear case with studs. Since I couldn't find one, I figured I'd just make my own.

This is what I came up with:


DIY Project: Studded iPhone Case

What you'll need:
hard iPhone case
flat studs
strong glue

long bamboo skewers or tooth picks (or what have you) to apply glue & move studs around


What to do:
1. Determine your pattern first. Use a ruler and a pencil, or tape if your case material won't tolerate pencil, as a guide if you feel like you need it. I free-handed mine, and they turned out fine.
2. Add a small amount of glue to a paper plate, it dries quickly, so refresh as needed. Start gluing your studs, being careful to place them straight and evenly.
3. Wait [impatiently] while the glue dries.

Voila! Awesome iPhone case!


Cost:
Clear iPhone 5 hard case, $2.99
100 flat stud, $9

Each case came out to approximately $7 each.


Now I just need to decide on which I will use first, gun metal, or silver? 


Thursday, December 20, 2012

DIY Project: Striped Baby Quilt

I started another quick little baby quilt last night, cut, pieces, and quilted it in one sitting, then finished the binding this morning.


For the top I used the same print as in my 1 Day Baby Quilt, Michael Miller's Wood Horses print, but in pink instead of the coral, and this time paired with 8 different shades of solid pink cotton.


I used half a yard of the Wood Horses print (same amount as last time), and a fat quarter of each of the other colors. I used 2 yard of a solid gray cotton for the backing. I made the binding from left over pink strips from the quilt top, and thus using up all 8 fat quarters. 


This time I did have enough backing material left to do a double layer binding, first folding the gray backing over the raw edge, and then adding my homemade double binding on top.


Although I mainly make it this way for added durability, I really love the look of the gray peeking out under the top layer, pink binding.


For batting I used a low loft organic bamboo batting, which makes for very thin, light, fluffy quilts. It came out of the dryer all crinkly soft, and I hope that my friend, Kristina, and her little baby girl, will get a lot of use out of it.


Fabrics:

Quilt top:
Michael Miller 'Wooden Horses' in pink and gray
8 fat quarters of Robert Kaufmann Kona Cotton, in 8 different shades of solid pink

Backing:
2 yards solid gray Kona Cotton

Binding:
Robert Kaufman Kona Cotton, in 8 different shades of solid pink

Wednesday, December 19, 2012

DIY Project in Action: 1 Day Baby Quilt

I made this 1 Day Baby quilt for my friend Annika's baby girl back in October, and on a recent visit to Sweden, as I walked into Annika's house, I spotted the quilt laying on the floor witch a bunch of toys scattered around it.


Annika told me how Melia plays on that quilt every single day. (Their cat also loves it, as you can see above.) It made me really happy to see that this gift that I spent my time making just for her, is actually being used, and it's part of their lives. And years from now, when my friend thinks back on this baby time, or looks at their baby photos, this little quilt is going to be there in the background.

This is one of my favorite reasons for gifting my little quilts. 

Tuesday, December 18, 2012

DIY Project: Stamped Holiday Cards

This project was purely an accident; I had no plans of making my own holiday cards this year. However, between traveling and catching a nasty flue, I forgot to order our cards. By the time I remembered (last night before bed), it was much to late to order with any hope of receiving them before Christmas, not to mention mailing them out in time.

Initially, I thought I might be able to use some left over cards from a few years ago, but when I went to dig them out, there were only 10 or so left. What to do?

I literary woke up in the wee hours this morning, with the idea of using a stamp I stumbled upon online a while back. At the time, I thought it was so funny to find a Swedish dalahorse style stamp here in the US, so I bought it without any real plan of what to use it for, then put it away in my stationary drawer, and forgot all about it. Until 2 am this morning.


I got up right away, and spent the early morning stamping cards. I snapped a few pics during the process, but just with my phone, so they aren't the best, but I figured I'd share them anyways. 


I'm so happy that I had all the supplies at home already, so I could start right away, but I would have preferred better card stock. (Note to self: stock up on better card stock.) I just so happened to recently have ordered a brand new set of stamp ink pads, in an array of colors, and I chose to go with a classic red for the cards.


The horse stamp also came with an extra little flower stamp, so I used that as well to decorate the cards, and the envelopes.


Initially I had planned on writing a holiday greeting on the outside of the card, but I scrapped that idea as it didn't look that great. I wish I had an alphabet stamp set, and I would have used that. Instead I wrote the greeting on the inside. 


When the cards were all done, I figured I might as well finish them for shipping. A few hours later, all our holiday cards are made, signed, addressed, and ready to be be dropped in the mail box today!

Wednesday, December 5, 2012

DIY Project: Felt Christmas Tree with Ornaments

I got this idea from Pinterest (of course) months and months ago, and while there are countless versions of this project out there, I really like this tutorial from the blog Johnny In A Dress.

As soon as I first saw this, I thought of a certain little Swedish girl, who I knew would LOVE something like this for the holiday season. But the holidays were still very far away at the time, so I filed it away for later in the year.


I finally made this project this week, and the whole thing took about 30 minutes from start to finish! All you need is about 1 yard of green felt, plus some colored felt for decorations, a scissor, and hot glue.


Unlike the original tutorial, I used a mix of plain and patterned felt, instead of decorating the ornaments myself. I also hot-glued a star to the top of the tree.


I added a couple of gift tags to some of the gifts under the tree, one with the gift-recipient's name, and one with "God Jul", which is Swedish for Merry Christmas.


I also added one gift with an unsealed top edge, to use as a pocket for the ornaments when not in use.


I attached the tree using wide, double-sided tape, and it worked brilliantly.


I hope this little felt tree will give a certainly little girl, who according to her mom "likes to re-decorate the tree every single day", a lot of joy this holiday season.

Sunday, December 2, 2012

DIY Project: Quick and easy Cheesy Christmas Ornament Earrings

I saw these earrings this morning at Target, and thought they would be perfect for a cheesy holiday get-together with some fabulous, holiday-loving girlfriends. I also realized I already had all the necessary supplies to make my own version at home.


This is what I came up with.


I made a bunch of them, in different shades of red & silver, and I cannot wait to wear these cheesy things to various holiday-related shenanigans! Now I just need a hideous reindeer sweater & decide if I'm mixing or matching the ornaments!

This project is so simple that it barely even needs a tutorial. Still, here are the very simple instructions to make your own Cheesy Christmas Ornament Earrings. Making time is approximately 2 seconds. No kidding.

DIY Cheesy Christmas Ornament Earrings

To make one pair of Cheesy Christmas Ornament Earrings.

What you need:
2 French wire earring hooks
2 mini ornaments, glass or plastic
2 jump rings


What to do:
1. Open jump ring just enough to slip on 1 Sterling silver French wire earring hook, and one mini ornament.


2. Close jump ring.
3. Repeat once again, to make a pair.
4. Done!

Price Comparison:

Original inspiration:
Happy Holidays Ornament Earrings, Target, $7.99 per pair

DIY Retail Knockoff:
$1 per pair


Saturday, December 1, 2012

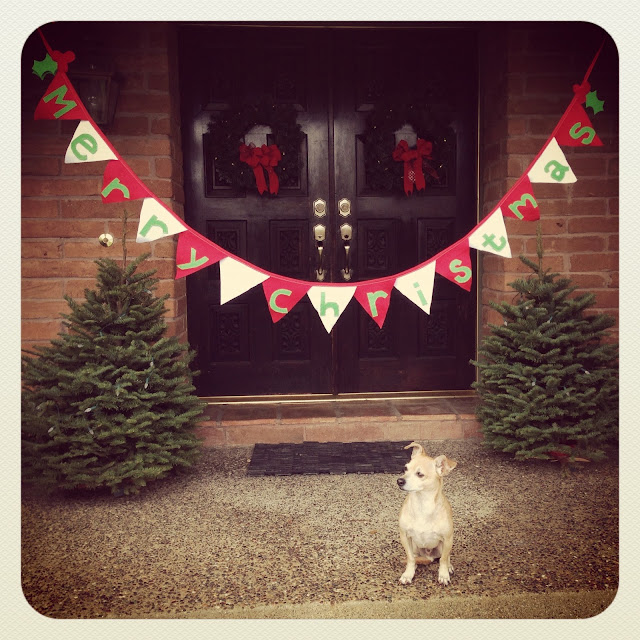
DIY Project: Winter Holiday Banner (Retail Knockoff)

I saw these adorable Kata Golda Winter Holiday Banners on Gilt the other day, for $100, discounted from the original $140. First I thought "Cute!", followed by "$100 for $10 of felt?!?". But... but... this thing is a perfect match for my Holiday decor! It would look so cute in my house!!! However, while very cute, it's worth nowhere near $100. So, I tried to make something similar myself.

Image source: katagolda.com


This is what I came up with.

DIY Project: Winter Holiday Banner Tutorial (Retail Knockoff)

I used the original specifications as a guide. Pennants are 7"x7", spelling the words "Merry Christmas" with one blank pennant included to create a space between words. Length is 86" plus an extra 32" of twill tape for hanging on each end.

What you will need:


White felt
Red felt
Light green felt
150" 0.75" twill tape, natural (I used red because I had some, but if I did another banner, I would make sure it was natural, or white instead)
Sewing machine with matching thread OR hot glue gun
apple green embroidery thread and needle (optional)

What to do:

1. Cut 8 red 7"x7" felt pennants, 7 white 7"x7" pennants, and 14 3"x3" squares of the apple green felt.


2. Cut out your letters from the light green felt squares, freehand or use a pencil to trace them first. Also cut out 6 green holly leaves, and 4 copies of the three red berries (or however many you would like, I made a few less than the original).


3. Attach letters to the pennants. The original banner have the letters attached by hand stitching, using a matching green thread, and they may or may not have been glued on first. You can either hot glue the letters in place, or attach them using a sewing machine, and then adding the green stitching afterwards, alternatively, just doing the hand stitching. I felt a bit iffy about the quality & longevity of my hand stitches, so I machine-stitched mine first. Remember to leave one blank pennant to create a space between the words.


4. To attach the pennants to the twill tape, lay your tape out on a large work surface, and measure 33" from one end. Place your pennants in the proper order, overlapping slightly (around 1") with each one. Don't forget the blank pennant between the words. For the original look, fold the pennants over the twill tape and zigzag over the fold. If you're using bias cut tape in place of twill tape, like I am, instead fold the double folded tape over the edge of the pennants, and attach either by matching stitching across each pennant on the twill tape (like the original), or, by using a hot glue gun.


5. Assemble your leaves and berry pieces for the decor, and lay them back to back, with the tape in the middle, on either side of the letters. Hand, machine-stitch or hot glue the berry decor onto the twill tape, one on each side of the pennants. I machine-stitched the berry pieces together over the tape, with the leaves in between.


6. If you want the same finish as the original, hand-stitch the light green embroidery thread around all the letters. This step isn't necessary, obviously, and it takes this project from a quick 30 minute project to a rather time consuming endeavor. In this case, the extra work is actually worth it, and the hand stitches add a really nice touch. While my banner looked fine before the stitches, it looks fantastic with them!


7. Voila! While my banner has slight differences from the original, and my photo isn't quite as fancy, in person they are actually very similar, and I'm very happy with my little holiday banner. It's very festive!


Cost Comparison:

Original:
$140, through Kata Golda website, or $100 at Gilt

DIY Retail Knockoff (generous approximation, since I had the supplies left over from previously projects): 
Felt: $5
Twill tape: $5
Embroidery thread & needle: $5
Total: $15

$15 compared to the original $140! Not a bad "retail knockoff". This project can be altered to fit any occasion, and I'm making a 'Happy Birthday!" one next. Of course, I'll post photos when it is finished.